FESTIVE PEPPERMINT CROCHET KITCHEN SET
A Photo-Inspired Christmas Pattern for Peppermint Potholders, a Hanging Towel, and Drawstring Cozies
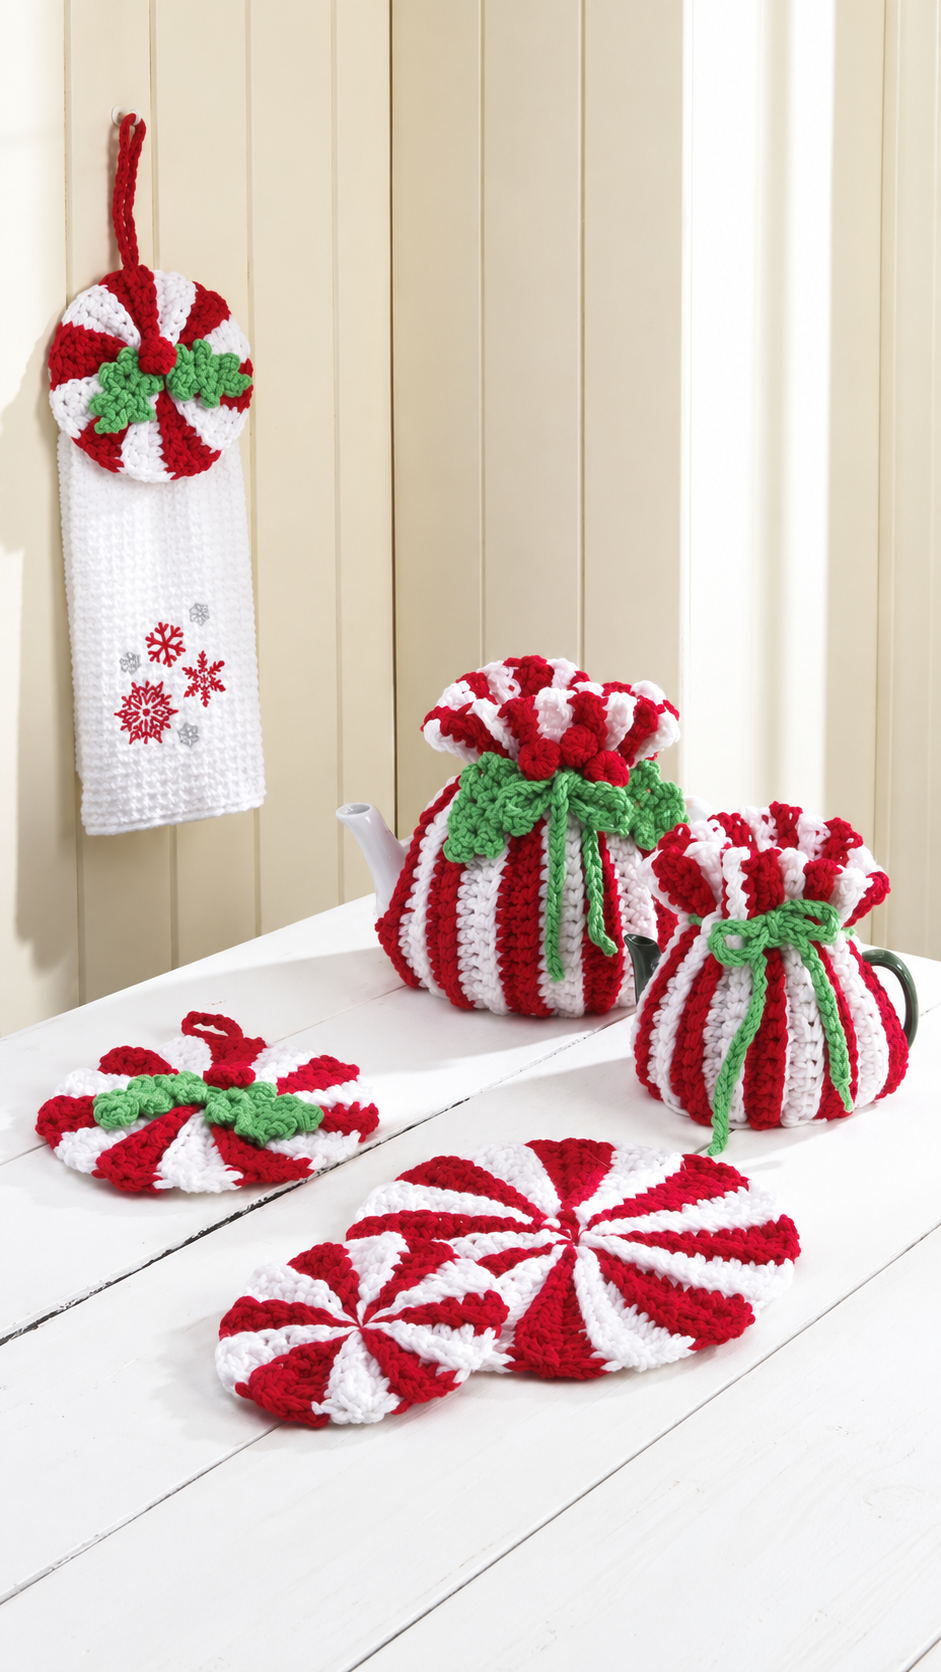
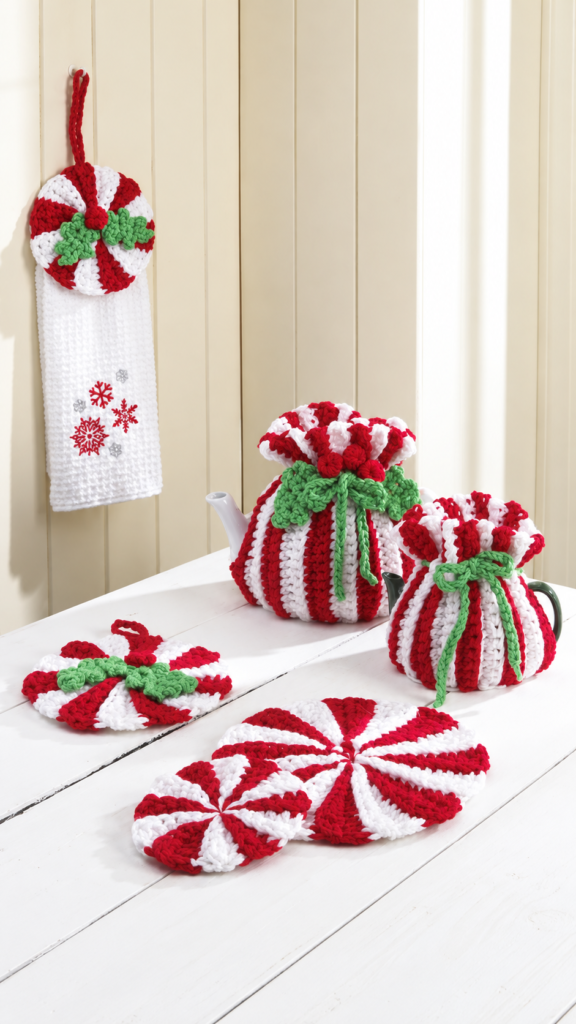
Bring cheerful Christmas color into your kitchen with this festive peppermint crochet collection. The set combines bright red and snowy white stripes with fresh green leaves, drawstrings, and decorative berries.
The reference display includes several coordinated pieces:
- Large round peppermint potholder
- Small round peppermint coaster or trivet
- Folded peppermint hot pad
- Hanging kitchen towel with a peppermint topper
- Large striped drawstring cozy
- Small striped drawstring cozy
- Green crocheted leaves and red berry decorations
The red-and-white spirals resemble classic peppermint candies, while the green leaves add a holly-inspired finish. You can make the complete matching collection or select only the pieces that suit your kitchen.
This project is especially attractive for Christmas decorating, holiday gifts, craft fairs, hostess presents, and seasonal kitchen baskets.
IMPORTANT PATTERN NOTE
This tutorial is a photo-inspired reconstruction.
The original written pattern is not available, and a photograph cannot reveal every hidden stitch, round, seam, or joining method. The instructions below are designed to help you create a similar festive peppermint kitchen collection rather than reproduce the original designer’s pattern exactly.
Make one test piece before producing a full matching set. Small adjustments may be required depending on your yarn, hook, tension, and intended use.
IMPORTANT HEAT-SAFETY NOTE
Use 100 percent cotton yarn for potholders, trivets, hot pads, and any item that may touch hot cookware.
Acrylic and polyester yarns can melt when exposed to high heat. Do not use synthetic yarn for heat-protective kitchen items.
A handmade potholder should be thick enough to prevent heat from passing through. Test it carefully before regular use. Decorative pieces should not be placed directly under open flames or extremely hot cookware.
PROJECT OVERVIEW
Project type: Coordinated Christmas crochet kitchen set
Skill level: Confident beginner to intermediate
Terminology: US crochet terms
Construction: Individual pieces worked separately
Main colors:
- Bright red
- White
- Leaf green
Recommended yarn: Medium-weight 100 percent cotton
Recommended hook: 4 mm to 5 mm
Main techniques:
- Magic ring
- Working in rounds
- Single crochet
- Half double crochet
- Double crochet
- Increasing
- Color changes
- Surface crochet
- Front-post stitches
- Working into back loops
- Crochet leaves
- Drawstring cords
- Seaming
- Blocking
WHY YOU WILL LOVE THIS PROJECT
This collection brings several practical kitchen projects together in one cheerful holiday theme.
Each piece uses the same three colors, so the finished collection looks coordinated even though the shapes and purposes differ. You can also use leftover yarn from one item to make the leaves, berries, hanging loops, and drawstrings for another.
Other reasons to make this set include:
- The peppermint colors are instantly recognizable.
- The pieces make beautiful handmade Christmas gifts.
- You can make one item or the complete collection.
- Cotton yarn is washable and practical.
- The round motifs provide useful practice with increases.
- The drawstring cozies are easy to resize.
- The green leaves add dimensional texture.
- The projects are suitable for craft fairs.
- The set can be customized for different holidays.
- Small accessories work up relatively quickly.
MATERIALS
For the complete set, you will need:
- Approximately 500 to 700 yards of white cotton yarn
- Approximately 450 to 650 yards of red cotton yarn
- Approximately 100 to 180 yards of green cotton yarn
- A 4 mm crochet hook
- A 4.5 mm or 5 mm crochet hook for the cozies, if needed
- A blunt yarn needle
- Sharp scissors
- Stitch markers
- Measuring tape
- Rustproof blocking pins
- Blocking mat
- Cotton kitchen towel for the hanging towel project
- Optional insulated cotton batting for potholders
- Optional cotton fabric for lining
- Optional metal or plastic ring for the hanging loop
- Optional silver snowflake appliqués for the towel
- Optional wooden beads for drawstrings
CHOOSING THE BEST YARN
Medium-weight cotton is the best choice for this collection.
Cotton creates firm stitches, absorbs moisture, tolerates washing, and is safer around heat than acrylic. It also provides good stitch definition for the peppermint stripes and leaves.
Mercerized cotton may be used for purely decorative pieces, but ordinary kitchen cotton is usually better for potholders and towels.
Choose red and white yarns of the same weight. If one color is thicker than the other, the peppermint circle may become uneven.
Good green options include:
- Holly green
- Emerald green
- Leaf green
- Forest green
- Apple green
For a softer vintage look, replace bright white with cream and bright red with burgundy.
SKILL LEVEL
The round peppermint motifs are suitable for confident beginners who understand basic increases and color changes.
The drawstring cozies and leaf decorations are intermediate-level projects because they require shaping, post stitches, or texture.
You should know how to:
- Make a magic ring
- Crochet in joined or continuous rounds
- Work single crochet
- Work half double crochet
- Work double crochet
- Increase evenly
- Change colors
- Read repeated instructions
- Sew crochet pieces together
- Weave in yarn ends
- Block cotton crochet
ABBREVIATIONS
MR: Magic ring
Ch: Chain
Sl st: Slip stitch
Sc: Single crochet
Hdc: Half double crochet
Dc: Double crochet
Fpdc: Front-post double crochet
St: Stitch
Sts: Stitches
Sp: Space
Rep: Repeat
Inc: Increase
Dec: Decrease
BLO: Back loop only
FO: Fasten off
SPECIAL TECHNIQUES
INVISIBLE COLOR CHANGE
Complete the final yarn-over of the last stitch with the new color.
Leave a tail approximately 6 inches long.
Continue with the new shade.
Later, weave both tails securely through the wrong side.
FRONT-POST DOUBLE CROCHET
Yarn over.
Insert the hook from front to back and then from back to front around the post of the indicated stitch.
Yarn over and complete a double crochet.
This stitch creates the raised vertical ridges used on the drawstring cozies.
REVERSE SINGLE CROCHET
Work single crochet stitches from left to right instead of right to left.
This creates a corded finishing edge.
PICOT
Chain 3.
Insert the hook into the first chain.
Complete a slip stitch.
The picot can be used to give the leaves a slightly pointed edge.
FINISHED MEASUREMENTS
Suggested measurements after blocking:
Large peppermint potholder: 9 to 11 inches across
Small peppermint coaster: 4.5 to 6 inches across
Folded hot pad: 7 to 9 inches across
Hanging towel topper: 5 to 6 inches across
Large cozy: 8 to 10 inches tall and 8 to 10 inches wide
Small cozy: 6 to 8 inches tall and 6 to 8 inches wide
Leaf: 2.5 to 4 inches long
The exact size depends on the yarn, hook, tension, and number of rounds.
GAUGE
Exact gauge is not essential, but the fabric for hot pads should be dense.
A suggested gauge is:
15 to 17 single crochet stitches equal 4 inches.
If the fabric has large gaps, use a smaller hook.
If the fabric feels stiff and difficult to work, move up one hook size.
Keep all matching pieces consistent by using the same hook and yarn throughout the set.
COLOR PLANNING
The classic peppermint appearance comes from alternating red and white sections.
You can create the spiral effect in several ways:
- Carry both colors around the motif
- Change colors in wedge-shaped sections
- Work a white circle and add red surface-crochet spirals
- Make separate red and white wedges and sew them together
- Alternate red and white rows for a simpler striped version
The wedge method most closely reproduces the bold candy-like sections visible in the image.
PART 1: LARGE PEPPERMINT POTHOLDER
This potholder is made from two matching circles joined together for thickness.
MAKE THE FIRST CIRCLE
ROUND 1
With white yarn, make an MR.
Chain 2.
Work 12 hdc into the ring.
Join with a sl st.
Pull the ring closed.
ROUND 2
Change to red.
Chain 2.
Work 2 hdc into every stitch around.
Join with a sl st.
You should have 24 stitches.
ROUND 3
Change to white.
Chain 2.
Repeat around:
Work 1 hdc into the next stitch and 2 hdc into the following stitch.
Join with a sl st.
ROUND 4
Change to red.
Chain 2.
Repeat around:
Work 1 hdc into each of the next 2 stitches and 2 hdc into the next stitch.
Join with a sl st.
ROUND 5
Change to white.
Chain 2.
Repeat around:
Work 1 hdc into each of the next 3 stitches and 2 hdc into the next stitch.
Join with a sl st.
Continue increasing in this way.
In every new round, add one additional ordinary stitch between increases.
Stop when the circle reaches the desired size.
CREATING THE PEPPERMINT WEDGES
The simple alternating rounds above produce rings rather than wedges. To create the spiral appearance, use one of the following methods.
SURFACE-CROCHET METHOD
Make a solid white circle.
Thread red yarn onto the hook.
Beginning near the center, work a curved line of surface slip stitches toward the outside edge.
Make six to eight evenly spaced curved lines.
Widen every red spiral by adding a second row beside the first.
WEDGE METHOD
Divide every round into 12 equal sections.
Alternate red and white sections.
When changing color, complete the final yarn-over of the previous stitch with the new color.
Carry the unused yarn loosely across the wrong side or cut the yarn after each section.
Shift every color change by one or two stitches in each new round. This creates the twisting peppermint effect.
MAKE THE SECOND CIRCLE
Repeat the same circle pattern.
For extra heat protection, place one or two layers of heat-resistant cotton batting between the circles.
Do not use ordinary polyester craft batting for a hot pad unless it is specifically labeled heat-resistant.
JOIN THE CIRCLES
Place the two circles with wrong sides together.
Join white or red yarn at the edge.
Work one round of sc through both layers.
At the end of the round, chain 12 to 18.
Sl st into the same point to create a hanging loop.
Work one round of sc around the chain loop for strength.
Fasten off.
PART 2: SMALL PEPPERMINT COASTER
Follow the same basic circle pattern.
Stop after Round 4 or Round 5, depending on the desired size.
For a thin coaster, use one layer.
For a small trivet or hot pad, make two circles and join them.
Finish with a sc or reverse-sc border.
The small motif can also be used as:
- Christmas tree ornament
- Gift tag
- Mug rug
- Garland decoration
- Jar topper
- Appliqué
- Table decoration
PART 3: FOLDED PEPPERMINT HOT PAD
The folded piece visible in the display resembles a doubled or folded peppermint motif.
Make two medium peppermint circles.
Place the circles together and crochet around approximately three-quarters of the edge.
Leave one section open if you want a pocket-style hand protector.
Alternatively, join the entire edge for a thick round hot pad.
Add a hanging loop at the top.
Sew or crochet green leaves over the loop attachment.
Add two or three small red berries to the center.
PART 4: CROCHET LEAVES
MAKE ONE LEAF
Chain 12.
Beginning in the second chain from the hook, work:
1 sc, 1 hdc, 2 dc, 3 tr, 2 dc, 1 hdc, and 1 sc.
Work 3 sc into the final chain.
Continue along the opposite side of the foundation chain.
Work the reverse sequence:
1 sc, 1 hdc, 2 dc, 3 tr, 2 dc, 1 hdc, and 1 sc.
Join with a sl st.
For a textured leaf, work one round of sl sts through the center chain.
Fasten off, leaving a long tail for sewing.
HOLLY-STYLE LEAF OPTION
Chain 14.
Work alternating groups of short and tall stitches along both sides of the foundation chain.
Add ch-3 picots between selected stitch groups.
This creates the pointed edges associated with holly leaves.
Make two or three leaves for each decoration.
PART 5: CROCHET BERRIES
Make an MR.
Work 6 sc into the ring.
Do not join.
ROUND 2
Work 2 sc into each stitch around.
ROUND 3
Work 1 sc into each stitch.
ROUND 4
Work six decreases around.
Add a tiny amount of cotton stuffing if desired.
Close the remaining opening with a yarn needle.
Leave a long tail for sewing.
Make two or three berries for each leaf cluster.
For flatter berries, work one round of 8 to 10 hdc into a magic ring and close it tightly.
PART 6: HANGING PEPPERMINT KITCHEN TOWEL
The hanging towel consists of a white towel section, a peppermint topper, green leaves, berries, and a red hanging loop.
MAKE THE WHITE TOWEL PANEL
Chain enough stitches to create a width of approximately 6 to 8 inches.
ROW 1
Work 1 sc into the second chain from the hook and every remaining chain.
Turn.
ROW 2
Chain 1.
Work 1 sc into every stitch.
Turn.
Repeat Row 2 until the panel measures approximately 14 to 18 inches.
For more texture, alternate sc and hdc rows.
You can also use the moss stitch:
Work 1 sc, chain 1, skip 1 stitch, and repeat across.
On following rows, work the sc stitches into the chain spaces.
SNOWFLAKE DECORATION
Use purchased washable appliqués or embroider simple snowflakes with red and silver thread.
To embroider a basic snowflake:
- Make one vertical line
- Cross it with one horizontal line
- Add two diagonal lines
- Add small branches at the ends
Secure every thread on the wrong side.
MAKE THE PEPPERMINT TOPPER
Make one medium peppermint circle approximately 5 to 6 inches across.
Create a second plain circle or semicircle for the back.
Place the towel’s upper edge between the two pieces.
Sew or crochet through all layers.
Make sure the towel is secured across its full width.
ADD THE HANGING LOOP
Join red yarn at the top of the peppermint topper.
Chain 25 to 35.
Sl st into the same point to form a loop.
Work one round of sc around the chain loop.
Fasten off securely.
ADD THE LEAVES AND BERRIES
Arrange two green leaves across the center of the peppermint circle.
Sew them securely.
Add two or three red berries in the middle.
PART 7: LARGE STRIPED DRAWSTRING COZY
The large cozy can be used decoratively around a teapot, storage jar, small container, or holiday gift.
Important: Do not place crochet directly over an open flame, heating element, or dangerously hot appliance.
MAKE THE BASE
With red yarn, make an MR.
ROUND 1
Work 10 sc into the ring.
ROUND 2
Work 2 sc into every stitch.
ROUND 3
Repeat around:
1 sc, increase.
ROUND 4
Repeat around:
2 sc, increase.
Continue increasing until the base reaches the required diameter.
MEASURE YOUR CONTAINER
Place the base beneath the container.
Stop increasing when the base is approximately the same width as the bottom.
MAKE THE SIDES
Work one round in BLO without increasing.
This creates a clear fold between the base and sides.
Begin alternating red and white vertical sections.
A simple version can be made with horizontal stripes, but vertical stripes more closely match the reference image.
VERTICAL RIDGE METHOD
Work the side panel separately in rows.
Chain enough stitches to equal the required height.
Work in BLO sc across every row.
Alternate red and white every two or three rows.
The BLO rows create vertical ribs after the panel is turned sideways.
Continue until the panel wraps around the container.
Sew the short ends together.
Sew the lower edge to the crocheted base.
MAKE THE RUFFLED TOP
Join red or white yarn around the upper edge.
ROUND 1
Work 2 dc into every second stitch.
ROUND 2
Work 2 dc into every stitch or work small shell groups around.
Alternate red and white sections to maintain the peppermint appearance.
The increases create the soft ruffle.
DRAWSTRING ROUND
Below the ruffle, work:
1 dc, chain 1, skip 1 stitch.
Repeat around.
This creates openings for the drawstring.
MAKE THE GREEN DRAWSTRING
Chain 80 to 120, depending on the cozy size.
Sl st into every chain to create a firm cord.
Fasten off.
Thread the cord through the eyelet round.
Tie it into a bow.
Add green leaves and red berries at the center.
PART 8: SMALL STRIPED DRAWSTRING COZY
Follow the large cozy instructions using fewer base rounds.
Measure the intended mug, jar, or container before beginning the side panel.
Leave openings for handles or spouts when necessary.
To create a handle opening:
Work back and forth instead of in complete rounds.
Skip the section where the handle sits.
Continue above the handle after the opening reaches the required height.
Add the same ruffled top, eyelet round, green drawstring, leaves, and berries.
PART 9: ASSEMBLING THE DECORATIONS
Lay each item flat before sewing on the leaves and berries.
Arrange the leaves first.
Place the berries over the leaf bases to hide the sewing points.
Use long yarn tails and a blunt needle.
Sew through several stitches, but avoid pulling so tightly that the decoration puckers.
For removable decorations, attach the leaves and berries to a small safety pin or brooch backing.
FINISHING
Weave every yarn tail through the wrong side.
Change direction at least once.
Trim only after the tail is secure.
Inspect:
- Hanging loops
- Drawstrings
- Towel attachment
- Berry seams
- Leaf attachment
- Potholder edges
- Color-change points
Reinforce any area that will experience regular pulling.
BLOCKING
Cotton pieces can be wet blocked or spray blocked.
FOR FLAT MOTIFS
Wet the item gently.
Press out excess water with a towel.
Pin the center first.
Pin the outer edge into a smooth circle.
Arrange the peppermint wedges evenly.
Allow the motif to dry completely.
FOR LEAVES
Pin the center vein straight.
Shape the sides and pointed tip.
FOR COZIES
Lightly spray the finished cozy.
Place it around a dry container of the correct size.
Allow it to dry while maintaining its shape.
Protect the container from moisture if necessary.
COMMON MISTAKES AND HOW TO FIX THEM
- THE PEPPERMINT CIRCLE RUFFLES
Cause:
Too many increases were added.
Fix:
Use fewer increases in the following round or move down one hook size.
- THE CIRCLE CUPS INWARD
Cause:
Not enough increases were added.
Fix:
Add evenly spaced increases or use a larger hook.
- THE SPIRAL LOOKS LIKE STRAIGHT STRIPES
Cause:
The color changes begin at the same point in every round.
Fix:
Shift each color change by one or two stitches in every new round.
- THE RED COLOR SHOWS THROUGH THE WHITE
Cause:
The unused yarn was carried too tightly or too close to the front.
Fix:
Carry it loosely along the wrong side or cut the yarn at each section.
- THE POTHOLDER IS TOO THIN
Cause:
Only one layer was used.
Fix:
Join two circles and add heat-resistant cotton batting if necessary.
- THE HANGING LOOP STRETCHES
Cause:
The chain was not reinforced.
Fix:
Cover the chain with sc or sl sts.
- THE TOWEL PULLS AWAY FROM THE TOPPER
Cause:
It was attached at too few points.
Fix:
Sew or crochet through the complete towel width.
- THE DRAWSTRING COZY SLIDES DOWN
Cause:
The cozy is too loose or the drawstring is positioned too high.
Fix:
Reduce the side-panel width and place the drawstring below the ruffle.
- THE RUFFLE DOES NOT FLARE
Cause:
There are not enough increases.
Fix:
Work two stitches into more of the stitches around the upper edge.
- THE RUFFLE IS TOO FULL
Cause:
Too many increases were added.
Fix:
Use fewer increases or remove one ruffle round.
- THE LEAVES CURL TOO MUCH
Cause:
Too many tall stitches were packed into the foundation chain.
Fix:
Remove one or two stitches or block the leaf firmly.
- THE BERRIES LOOK UNEVEN
Cause:
Different stitch counts or amounts of stuffing were used.
Fix:
Use the same pattern and stuffing amount for every berry.
- THE COLORS BLEED WHEN WASHED
Cause:
The yarn is not colorfast.
Fix:
Wash a small red yarn swatch before beginning the complete set.
- THE HOT PAD TRANSFERS HEAT
Cause:
The fabric is too thin or loosely stitched.
Fix:
Add another cotton layer and test carefully before regular use.
CARE INSTRUCTIONS
Always follow the yarn label.
For cotton kitchen pieces:
- Hand wash or use a gentle machine cycle.
- Wash red and white pieces in cool water.
- Use a color-catching sheet if necessary.
- Avoid bleach unless the yarn label allows it.
- Reshape the items while damp.
- Dry flat.
- Do not hang heavy wet pieces.
- Reblock round motifs if required.
Remove the cozy from the container before washing.
Never place wet crochet near electrical appliances or heating elements.
CUSTOMIZATION IDEAS
CLASSIC CHRISTMAS
Use bright red, white, and holly green.
VINTAGE CHRISTMAS
Use burgundy, cream, and dark forest green.
PASTEL PEPPERMINT
Use pink, white, and mint green.
GINGERBREAD VERSION
Use brown, cream, red, and green.
CANDY-CANE VERSION
Use narrower red-and-white sections.
Add a green border.
WINTER VERSION
Use blue, white, and silver.
Replace holly leaves with snowflakes.
HALLOWEEN VERSION
Use orange, black, and purple.
Replace the leaves with small crocheted bats.
VALENTINE VERSION
Use red, pink, and white.
Replace the holly leaves with hearts.
GIFT IDEAS
Combine several pieces in a holiday gift basket.
Possible combinations include:
- Potholder, towel, and wooden spoon
- Mug cozy, coaster, and hot chocolate
- Teapot cozy, tea bags, and a holiday mug
- Two potholders and a cookie mix
- Hanging towel and handmade soap
- Full kitchen set in a decorative basket
FREQUENTLY ASKED QUESTIONS
IS THIS THE EXACT PATTERN SHOWN IN THE IMAGE?
No. This is a photo-inspired reconstruction.
The photograph does not reveal every hidden stitch, seam, or measurement. Adjustments may be required.
WHAT ITEMS ARE INCLUDED IN THE DISPLAY?
The display appears to include peppermint potholders or trivets, a hanging towel, and two drawstring container cozies decorated with leaves and berries.
WHAT YARN SHOULD I USE?
Use 100 percent cotton for kitchen items, especially potholders and hot pads.
CAN I USE ACRYLIC YARN?
Acrylic can be used for decorations that will never touch heat.
Do not use acrylic for potholders, trivets, or hot pads because synthetic yarn can melt.
HOW MUCH YARN DO I NEED?
The complete collection may require approximately:
- 500 to 700 yards of white
- 450 to 650 yards of red
- 100 to 180 yards of green
The exact amount depends on the number and size of the pieces.
HOW DO I MAKE THE PEPPERMINT SPIRAL?
Divide the circle into alternating red and white sections.
Shift the color-change points slightly in each round so the sections curve.
A simpler option is to surface crochet red spirals over a white circle.
CAN I USE A STORE-BOUGHT TOWEL?
Yes.
Fold or gather the upper edge and place it between two crocheted topper pieces.
Sew or crochet through all layers securely.
CAN I MAKE THE COZY FOR A SPECIFIC CONTAINER?
Yes.
Measure the base circumference and height.
Make the base the same diameter as the container, then work the side panel to the required height.
SHOULD THE COZY TOUCH A HOT TEAPOT?
Use caution.
Cotton can tolerate moderate warmth, but the cozy should not touch open flames, heating elements, or dangerously hot surfaces.
HOW CAN I MAKE THE POTHOLDER THICKER?
Join two crocheted circles and add heat-resistant cotton batting between them.
CAN I SELL FINISHED ITEMS MADE FROM THIS GUIDE?
You may sell the physical items you crochet.
Use your own photographs and product descriptions. Do not use the reference image as a photograph of an item you personally made.
QUICK PATTERN SUMMARY
- Choose red, white, and green cotton yarn.
- Make peppermint circles using alternating color sections.
- Join two circles for thick potholders.
- Add reinforced hanging loops.
- Crochet green leaves and red berries.
- Make a white towel panel or use a purchased towel.
- Attach a peppermint topper and hanging loop.
- Crochet circular bases for the drawstring cozies.
- Add vertically striped side panels.
- Create ruffled red-and-white tops.
- Add green drawstrings, leaves, and berries.
- Weave in all yarn ends.
- Block and shape every piece.
- Test all heat-protective pieces carefully before use.
FINAL THOUGHTS
This festive peppermint crochet kitchen collection combines practical handmade accessories with joyful Christmas color.
The red-and-white candy swirls immediately create a holiday mood, while the green leaves and berries tie the separate pieces together. Because every item uses the same palette, you can make the projects gradually and still create a coordinated collection.
Begin with a small peppermint coaster to test your tension and color changes. Once you are comfortable with the circular shaping, move on to the potholders, towel topper, and drawstring cozies.
Whether you make one decorative piece or the complete set, this photo-inspired peppermint collection will add warmth, color, and handmade charm to your holiday kitchen.
SEO TITLE
Festive Peppermint Crochet Kitchen Set Free Photo-Inspired Pattern
META DESCRIPTION
Create a festive peppermint crochet kitchen set with red-and-white potholders, a hanging towel, striped drawstring cozies, green leaves, and berries. Includes materials, instructions, troubleshooting, care, and FAQs.
SUGGESTED URL SLUG
festive-peppermint-crochet-kitchen-set
SUGGESTED KEYWORDS
peppermint crochet pattern
Christmas crochet kitchen set
crochet peppermint potholder
crochet hanging kitchen towel
Christmas crochet hot pad
crochet teapot cozy
crochet mug cozy
red and white crochet pattern
holiday kitchen crochet
crochet holly leaves
Christmas potholder pattern
free Christmas crochet pattern
PINTEREST TITLE
Festive Peppermint Crochet Kitchen Set Free Pattern
PINTEREST DESCRIPTION
Create a cheerful Christmas kitchen collection with red-and-white peppermint potholders, a hanging towel, striped drawstring cozies, green leaves, and red berries. This free photo-inspired guide includes materials, detailed instructions, common mistakes, care tips, and FAQs.