DIY Micro-Crochet Lily of the Valley Necklace with Pearls (Free Pattern)
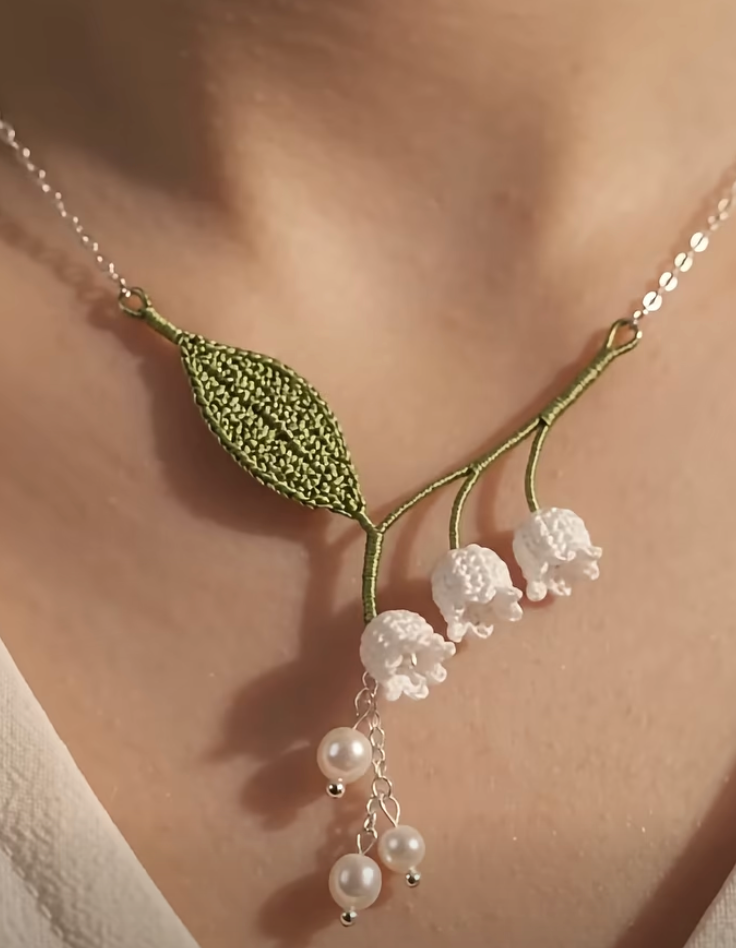
Discover how to craft an exquisite micro-crochet Lily of the Valley pendant necklace featuring delicate bell-shaped blossoms, a sculpted leaf, and luminous dangling freshwater pearls on a silver chain. Known botanically as Convallaria majalis, this flower symbolizes pure joy, renewal, and timeless elegance.
✨ Pattern Specifications:
- Skill Level: Intermediate / Adventurous Beginner
- Craft Type: Micro-Crochet Jewelry & Wire Assembly
- Hook Size: 0.6 mm (US Size 14 Steel Hook) or 0.75 mm
- Terminology: Standard US Crochet Terms
🧶 Materials & Craft Tools Checklist
Working in micro-crochet requires minimal tools but high-precision thread. Here is the curated checklist of materials needed to make this floral pendant necklace:
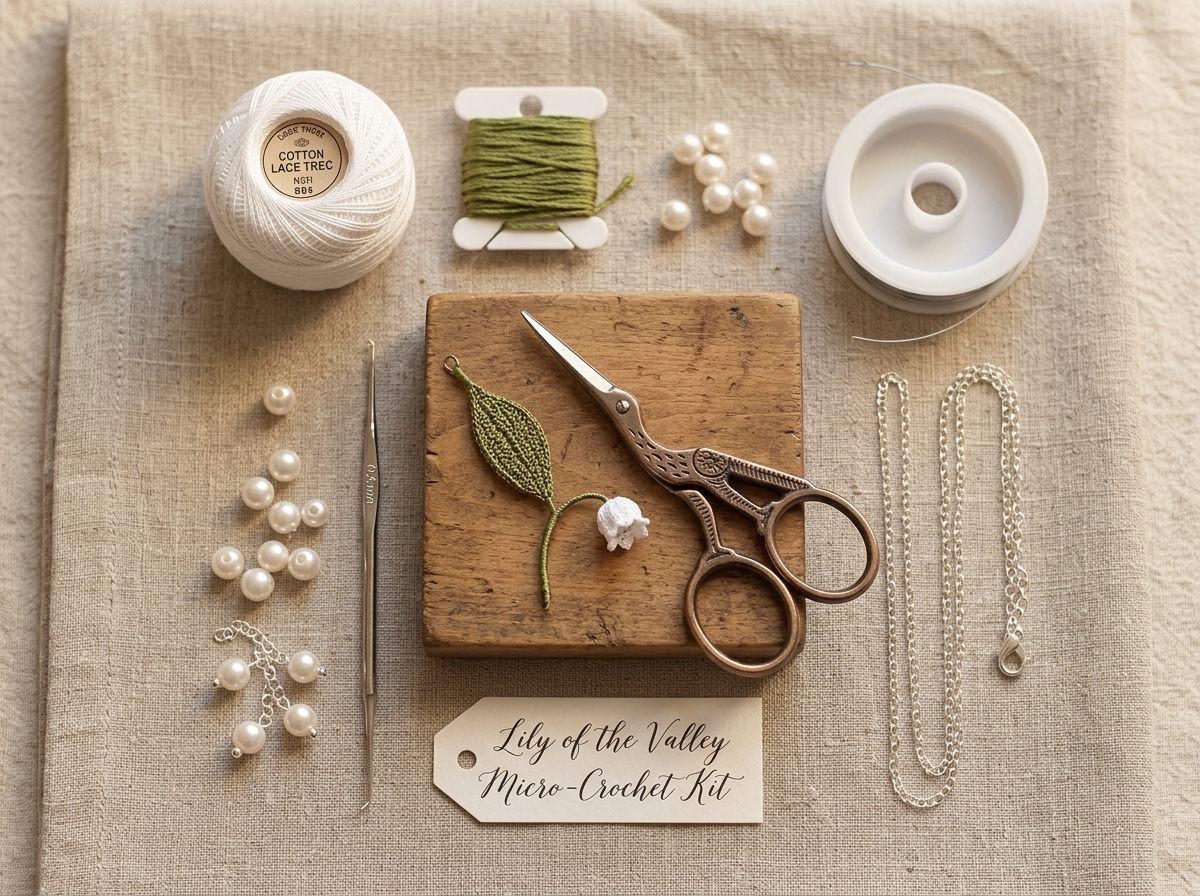
- White Lace Thread: Size 80 or Size 50 Cotton Lace Thread in Pure White (e.g., DMC Cordonnet Spécial or Lizbeth #80).
- Green Foliage Thread: Olive / Moss Green Embroidery Floss (DMC 3363 or 3051) for leaf crocheting and stem wrapping.
- Steel Crochet Hook: Size 0.6 mm (US 14 Steel) or 0.75 mm.
- Freshwater Drop Pearls: 3 white teardrop or round pearls (4 mm to 6 mm diameter).
- Structural Craft Wire: 28-gauge or 30-gauge silver or craft wire (approx. 20 cm).
- Jewelry Findings: 3 silver ball-head pins, 2 tiny silver jump rings (3 mm), 16″–18″ fine sterling silver link chain with lobster clasp.
- Jewelry Tools: Mini round-nose pliers, wire cutters, and embroidery scissors.
- Optional Stiffener: Matte fabric stiffener or diluted PVA glue to hold rigid 3D bell structure.
📋 Standard US Crochet Abbreviations
🌸 Step 1: Crocheting the Petite Bell Blossoms (Make 3)
Each tiny white blossom is worked in continuous rounds to form a cup, finishing with fluted picot ruffles that flare outward:
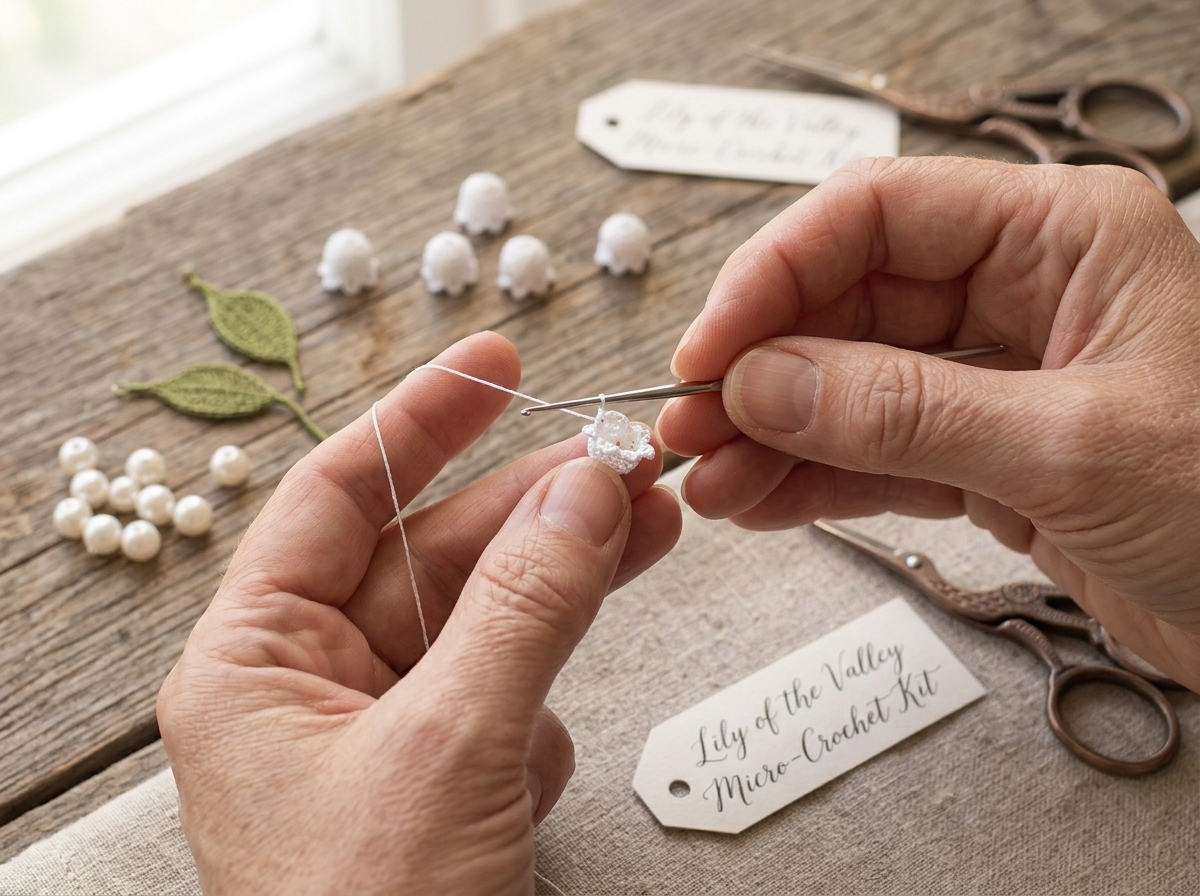
🌸 Written Blossom Pattern:
- Round 1: Using pure white lace thread, form a Magic Ring, ch 1, 6 sc into ring. Gently pull tail to close ring. [6 sts]
- Round 2: Work 1 inc (2 sc) in each stitch around. [12 sts]
- Rounds 3–5: Work 1 sc in each stitch around for 3 continuous rounds. The piece will naturally curve into a cylinder. [12 sts per round]
- Round 6: Work [1 sc, inc] 6 times around to widen the base. [18 sts]
- Round 7 (Fluted Petal Edge): *Sl st in next st, (1 sc, ch 2, sl st into 1st ch for picot, 1 sc) all in next st, sl st in next st*. Repeat from * 6 times around to form 6 fluted petals.
- Finish: Fasten off leaving a 4-inch tail. Weave into inner wall.
🌿 Step 2: Crocheting the Wired Olive Green Leaf
Working around a piece of 28-gauge craft wire gives this leaf crisp botanical realism and lets you curve it gracefully over your collarbone:
- Cut 12 cm of 28-gauge craft wire. Hold parallel behind your crochet hook.
- Using green thread (2 strands floss or fine lace thread), work ch 18 over the wire.
- First Side: Working in 2nd ch from hook over wire: sl st 1, sc 2, hdc 3, dc 6, hdc 3, sc 2.
- Leaf Tip: In final chain: work (1 sc, ch 2, sl st in 1st ch to form sharp tip, 1 sc) while curving wire 180 degrees.
- Second Side: Working down opposite side of chain: sc 2, hdc 3, dc 6, hdc 3, sc 2, sl st 1.
- Center Vein: Work tight slip stitches down the center line of the leaf to create a realistic raised botanical spine. Fasten off leaving tail.
✨ Step 3: Assembly, Thread Wrapping & Pearl Drops
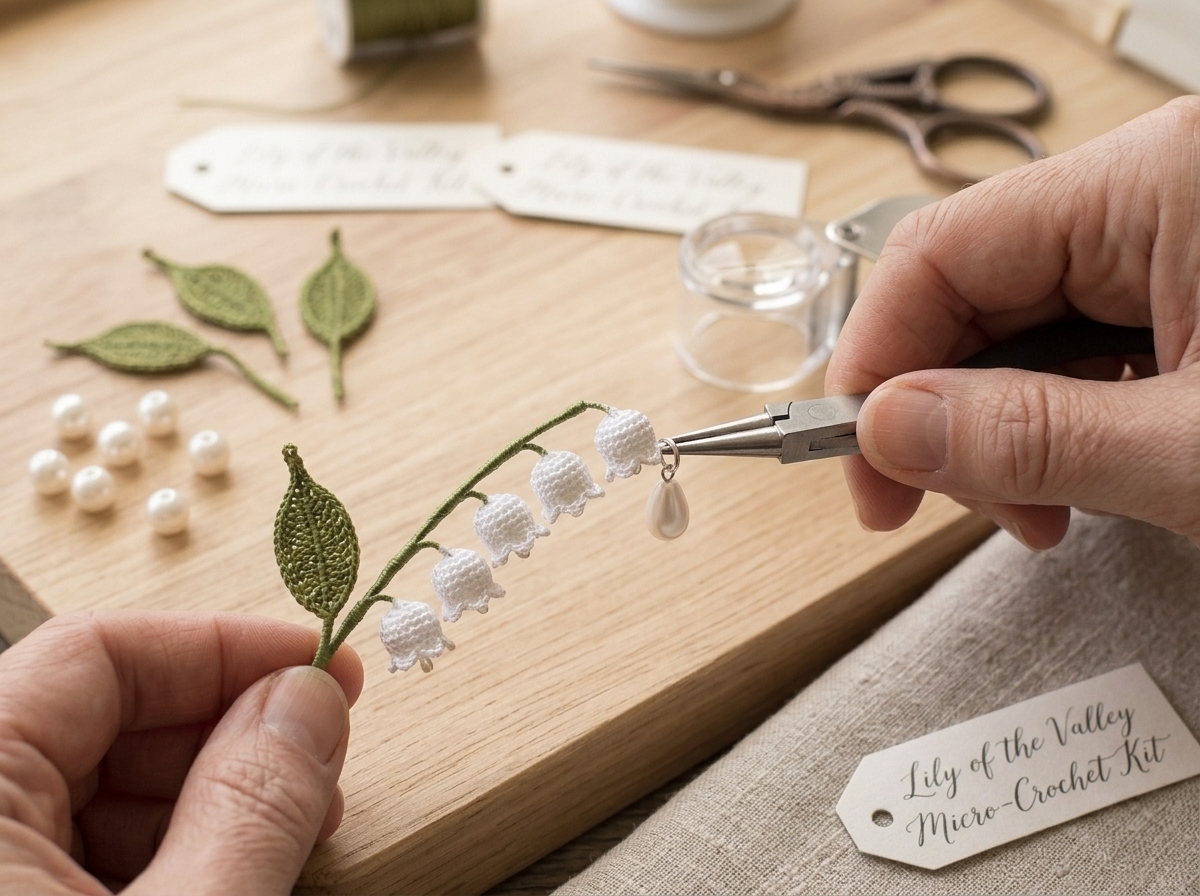
- Pearl Drops: Thread each freshwater pearl onto a silver ball-head pin. Use round-nose pliers to create a secure wrapped eye loop at the top.
- Suspend Inside Flowers: Pass the pin wire through the top center of each crocheted bell from inside out so the pearl dangles like a glistening morning dewdrop.
- Stem Wire Armature: Connect the 3 bell stems at staggered intervals along the main stem wire next to the green leaf.
- Floss Wrapping: Take 3 strands of green embroidery floss and wind tightly around all exposed wire from top to bottom. Touch wire ends with a dab of jewelry glue to lock.
- Connect Chain: Using small silver jump rings, connect both outer ends of the botanical branch to your silver chain so it rests flat and balanced against the neckline.
💎 Care & Stiffening Guide
🌿 How to keep your crochet jewelry crisp & pristine:
- Shape Retention: Lightly coat the inside of each bell with a 1:2 mixture of clear PVA craft glue and water. Let dry overnight on a tapered brush handle.
- Water Care: Always put your jewelry on after applying perfumes, lotions, or hairspray, and avoid getting it wet.
- Storage: Store flat in a dry jewelry box away from direct moisture.